|
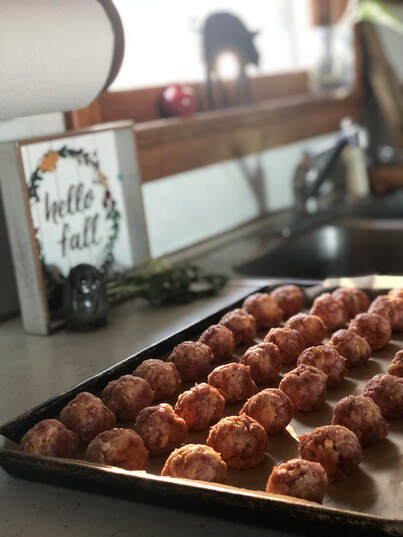
Sausage balls are one of our favorite snacks and a batch does not last long around here. They are the perfect appetizer to bring to a party or pack in a picnic.
1 lb. sausage 1 egg 1 cup almond flour 1 cup shredded cheddar cheese 2 teaspoons baking powder pinch of salt Preheat oven to 375 and line a sheet pan with parchment paper. Combine all ingredients and mix together by hand. Form golf size balls and bake around 10-12 minutes, flipping halfway so both sides are a little crispy.
0 Comments
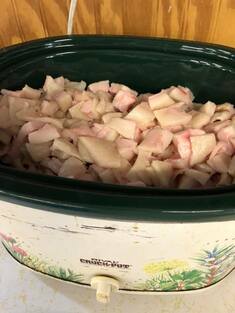
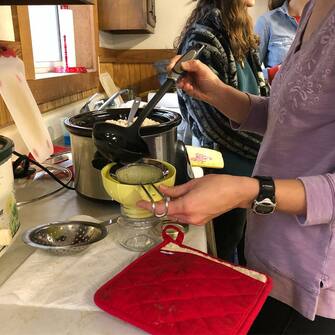
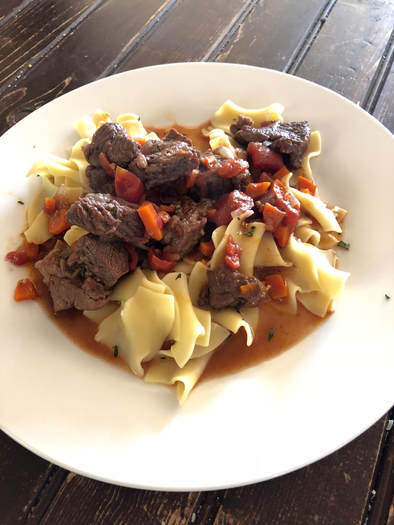
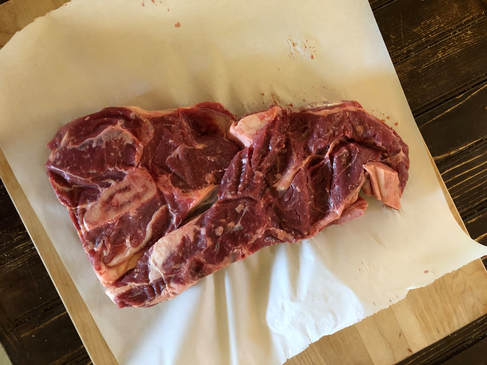
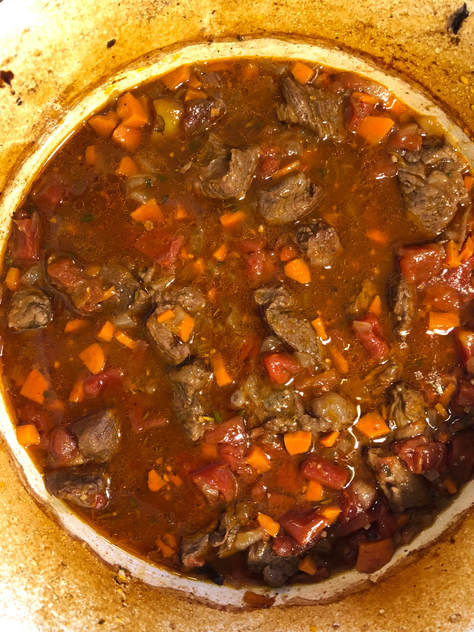
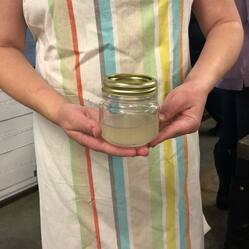 On a grey Saturday in December a few weeks before the hustle and bustle of the season took hold of all of our schedules, a group of women gathered in our market to learn more about the lost art of pastured lard. We all had our different reasons for wanting to learn more. A handful were health. A cooking alternative to butter and the prospect of a new cooking oil was exciting to have in the mix. Some of us had memories of our grandmothers using lard in the kitchen and felt the pull to get back to the basics, using the ingredients that used to be a staple in any kitchen. We all had one thing in common. No one had any clue on how to render lard! Enter in our teacher, Sharon Kay, of Fawn Crossing Farm. Andrew and I have known Sharon since the beginnings of starting our farm and she actually had quite a hand in helping us craft the vision of what we wanted. She is full of wisdom, insight, and after hearing her tell the most wonderful stories of making lard with her grandmother as a young girl I knew she would be the perfect teacher for this class. Rendering lard is actually incredibly simple but there were some really great tips that Sharon gave us that will help you have success with your own lard. 1. The crockpot is your friend Yes, you may find instructions on the internet that tell you to render lard on the stovetop but using a crockpot saves you time and ensures you don't accidentally burn your fat. 2.All Lard is not created equal Leaf lard is your premium lard. It will usually be labeled as "kidney pork fat" on the packaging. This type of fat is ideal to use when baking. If you just have regular pork fat, no worries. Leaf lard is just the filet mignon of the lard world. I also want to point out that one of best health benefits of using lard is the high Omega content, however, this is ONLY obtained by using pastured pork as your fat source. (This is where Cool Breeze Farm can step in and help!) 3. When I say tiny, I mean TINY Cut up your lard in tiny, itsty, bitsy pieces. I hope you are reading this and not going off of the picture because I am using it as an example of what NOT to do. See the big chunks? Yeah, don't do that. It will take twice as long to get break down and you don't get as much oil out of it. I don't have a picture to show you how small Sharon cut hers but take one of my cubes and cut it in about 6 or more little pieces and you'll be set! 4. Ditch the messy cheese cloth and use a fine mesh strainer Preferably use one that will set into a funnel that sits inside a wide mouth jar. Here is a picture of our set up: 5. Best methods of storage Sharon had some great tips like pouring your lard into a plastic ice cube tray, freezing, and then popping the cubes into a zip lock bag. You can take a cube out as you need for cooking or baking. She also used the same method with aluminum cupcake liners. Freeze upright and then store in zip lock bag in the freezer. We put ours in mason jars which can be refrigerated or kept on the counter at room temp. This will be really helpful if you are using lard to make pie crusts or biscuits because cold lard is recommended! Here is the condensed version of how to render lard: -Cut up pork fat into very tiny pieces. -Place in crock pot on high, stirring here and there. (cook on low if you want to set it and get other things done, it will just take longer to break down) -When you start to see a lot of breakdown of the fat (aka oil) you can start scooping the oil out with a ladle and pouring into your mason jar. This will start after 30 minutes and you can continue to let fat cook down until it stops producing a lot of oil. Expect 1-2 hours max. -Cool your mason jars on the counter and when it starts to harden it should turn a snowy white and there you have it! Rendered lard! Use your rendered lard to saute vegetables, meats, or in your baked goods like pie crusts, or tortillas. Have any questions or want to purchase some pork fat to make your own lard at home? Send me an email at [email protected] I admit I am not very adventurous when it comes to cooking a chuck roast. I do the only thing I know how to do--beef stew! Potatoes, carrots, & roast in a hearty sauce that I sometimes thicken into a gravy. It's delicious. It tastes like home. It's pretty much the only thing I know how to do with a big roast. Until now! While perusing Pinterest for an upcoming Thanksgiving recipe book I stumbled upon a gorgeous photo of pieces of tender beef in an tomato and red wine based sauce served over noodles. It had me at hello. I clicked to find that the recipe used a chuck roast, cut into 2 inch cubes, cooked low and slow. Well, I'll be. I never thought about cutting up a roast and then cooking it! The best thing about this recipe? It sounds super fancy. Like, I'm having a dinner party and on the invitation I am going to list "Beef Daube Provencal" as the entree being served so I can feel like Julia Childs kind-of-fancy. Don't let the name fool you. This was so simple! It doesn't have complicated ingredients and it's always a bonus when you cook with red wine and then have the rest of the bottle to enjoy. The beef turned out tender and the sauce is bursting with flavor from the wine, rosemary, garlic, & thyme. Read on for the recipe and start planning that dinner party! Beef Daube ProvencalRecipe by Cooking Light via My Recipes.
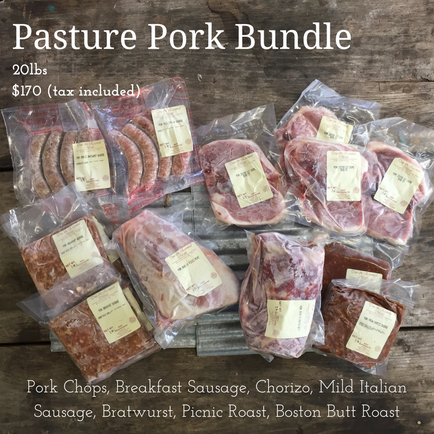
Step 1 Preheat oven to 300°. Step 2 Heat olive oil in a small Dutch oven over low heat. Add garlic to pan; cook for 5 minutes or until garlic is fragrant, stirring occasionally. Remove garlic with a slotted spoon; set aside. Increase heat to medium-high. Add beef to pan. Sprinkle beef with 1/2 teaspoon salt and 1/4 teaspoon black pepper. Cook 5 minutes, browning on all sides. Remove beef from pan. Add wine to pan, and bring to a boil, scraping pan to loosen browned bits. Add garlic, beef, remaining 1 teaspoon salt, remaining 1/4 teaspoon pepper, carrot, and next 8 ingredients (through bay leaf) to pan; bring to a boil. Step 3 Cover and bake at 300° for 2 1/2 hours or until beef is tender. Discard bay leaf. Serve over noodles. Garnish with chopped fresh thyme, if desired. Note: To make in a slow cooker, prepare through Step Place beef mixture in an electric slow cooker. Cover and cook on HIGH for 5 hours. Click here to order your chuck roast from Cool Breeze Farm!Meal planning. Those two words used to send my type B personality slowly backing away towards the door until I could break in a sprint with my fingers in my ears saying "la la la, I can't hear youuuu" because THAT'S how much I resisted the idea. I did that song and dance thinking I could pull it off on the fly until my evenings were a scramble of stress, too many dirty dishes, & slapped together dinner combos that no one was really enjoying. The day ended in frustration and feeling like I was failing at one of my most important tasks: feeding my family. I realized it wasn't the cooking process that would totally overwhelm me. It was the step of getting meats from the market into my home freezer that was the problem. As a mom and small business owner, the amount of decisions that I have to make daily can override my system. What time do we need to be out of the door to make it to the play date? Which emails do I reply to first? Has he taken his medicine today? Don't forget to pick out a birthday present for Grammy! Oh and don't get me started on the outfit choices I have to shuffle through for my 5 year old daughter. I'm like you. I want to know my family is eating healthy, high quality meats but I don't want to have to sort through allllllll the options and make the decision. Just give me what I need and then I can make a plan based on that. To make your meal planning easier and to take one more decision off of your plate we've put together our Pasture Pork Bundle. Depending on your family size, I estimate that this bundle could make 12-15 meals...possibly more! Our 20 lb box includes the following cuts: Pork Chops Boston Butt Breakfast Sausage Chorizo Bratwurst Mild Italian Sausage Picnic Roast Just think of it. You're sitting down writing out your weekly meal plan and everything you need is in your freezer waiting to be paired with a yummy recipe. Interested in adding some grass fed beef? Tell us what you cook the most (burgers, roasts, date night steaks..) and we can put together a bundle especially for your needs. Life is busy and full of decisions. Let us help you fill your freezer for the month and make one step of meal planning easy-peasy. What's holding you up from your meal planning goals? Is there something we can help with? Shoot me an email at [email protected] and let me know your dinner time struggles.
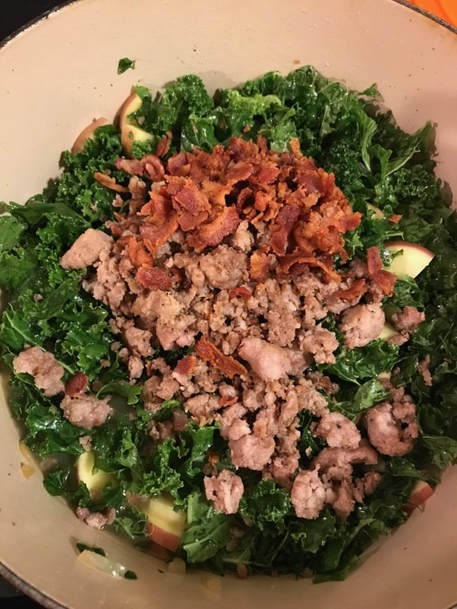
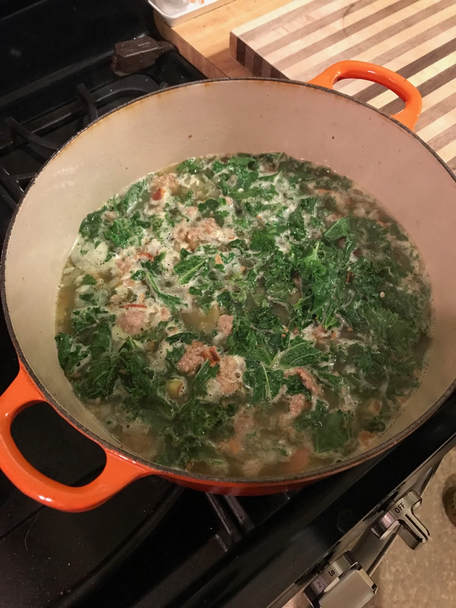
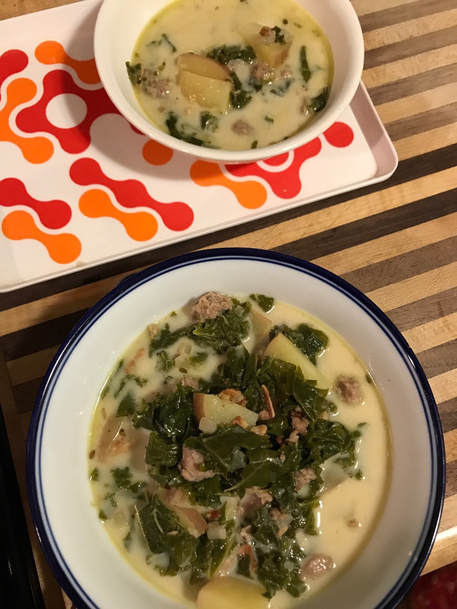
Today I have a great recipe to share with you from my friend Sera. Sera is a part of my life in so many ways. Her family was not only one of the founding Cool Breeze Farm members (or the "OG" Original Gagstas as we sometimes refer to those 4 sweet families that helped the launch of our farm) but we also sing in a band together and she is a wildly talented local photographer that has captured some of the best pictures of my family. She's also a fabulous cook so I can always trust her opinion on a new recipe. When she picked up some of our new Italian sausage and shared this dish she made with it I knew I had to try!
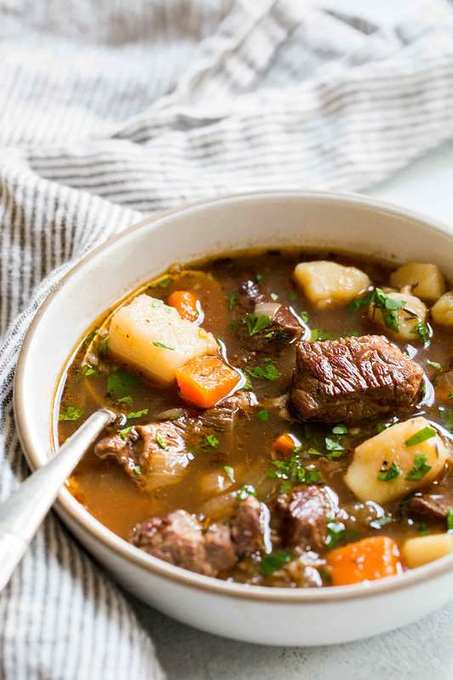
We've had great feedback about our mild Italian sausage and are stocked up at the market! Swing by and pick up some for your meal plan this week or next. Thanks so much for sharing this meal with us Sera! Enjoy, -Valerie Zuppa Toscana★★★★★ Entrée, Soup Servings: 6 servings Source: alaskafromscratch.com Ingredients1 tablespoon olive oil 1 pound italian sausage 4 slices bacon crumbled ¼ teaspoon red pepper flakes (or to taste) 2 cloves garlic, minced 1 onion, diced 8 cups chicken broth (2 cartons) 4 red potatoes, sliced into quarters 1 bunch kale, chopped 1 cup heavy cream 1/2 teaspoon oregano salt and pepper to taste DirectionsIn a large pot over medium heat, brown the sausage. Drain. In thevsame pot cook the bacon and then drain and crumble. Clean out pan leaving some of the bacon fat. If needed add 1 tablespoon olive oil. Add the red pepper flakes, garlic, and onion and cook, stirring often, until the onions a translucent and the garlic is fragrant, about 4 minutes. Add the chicken broth, potatoes, kale, sausage and bacon. Bring the broth to a simmer, reduce the heat to medium-low, and cook until the potatoes are tender, about 20-30 minutes. Remove the soup from the heat, stir in the cream, and season with salt and pepper to taste. Ladle into soup bowls and serve. My Nan has this same quote hanging on a plaque in her kitchen and it's always made me chuckle. Growing up we always celebrated St. Patty's day with the traditional corned beef & cabbage dinner. It's the only time of the year that we have it and I have the best memories of sitting down together as a family and enjoying this Irish tradition. I've never thought to look up how corned beef is actually made (isn't if funny the things you eat that you don't even question how it got that color or taste?!) but it turns out it is a beef brisket soaked in a brine for a few days with curing salts and spices. Who knew?! My timeline was a little off to undertake that new frontier of curing beef but I've got it on my curing bucket list now. Have no fear--I've got two substitute recipes that will make your St. Patrick's day feast special with a nod to our friends in green. Irish Beef Stew via Simply Recipes I think this looks delicious and the perfect dish for this last cold snap of weather we are having in March. Using our grass-fed, tender stew meat slowly simmered in broth made with Guinness, your family & guests will feel lucky to have you as the cook in the kitchen on Saturday! Roast Pork with Cabbage and Potatoes via Upstate Ramblings I think my favorite part of the traditional corned beef dish is the cabbage and potatoes so I LOVE this alternative recipe using a pork loin roast. You can even sub some Irish beer instead of the broth for a little more festive flavor. What are you planning on cooking up for St. Patrick's day?! If you aren't into corned beef or just want to try something different this year, I hope these give you some inspiration and you visit our Market to pick up your grass fed beef or pasture pork cut to make a new tradition this weekend! Give us a heads up and we can go ahead and thaw out your selection for pick up on Saturday morning so you are all ready to cook up a storm!
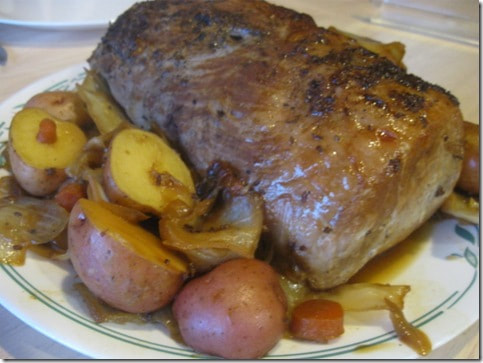
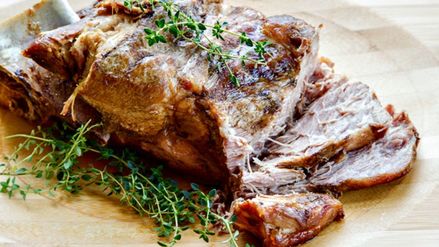
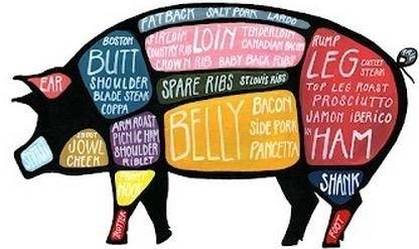
May the luck of the Irish be with you! Valerie Market Hours Tues/Thurs- 4:30-6:30 Saturday: 10:30-12:30 email [email protected] for questions or pre-orders 273 Salem Church Rd. Mt. Sidney, VA 24467 I LOVE a good pork roast. It's easy to cook, versatile in flavoring, & can stretch to 2-3 meals for my family. Larger roasts can seem a bit intimidating if you aren't familiar with cooking one but I'm going to break it down and show you some options that will inspire your next family dinner! Here's just a little more info about what part of the pig roasts come from. We have two offerings, the boston butt and the picnic roast. As you can see from our colorful little piggy above, the buston butt & picnic "ham" (same thing as picnic roast) are stacked on top of each other on the pigs shoulder going down to the front leg. They are similar in many ways with some slight differences. The boston butt has more connective tissues so I find it to be a little more tender than the picnic roast. We keep the bone in for added flavor.
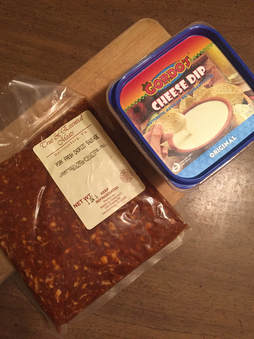
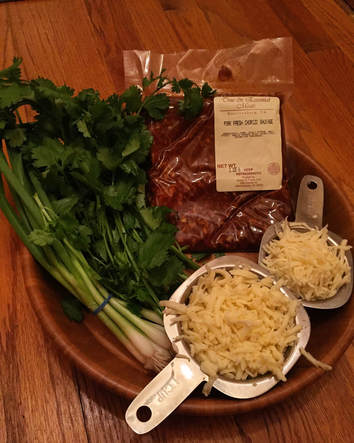
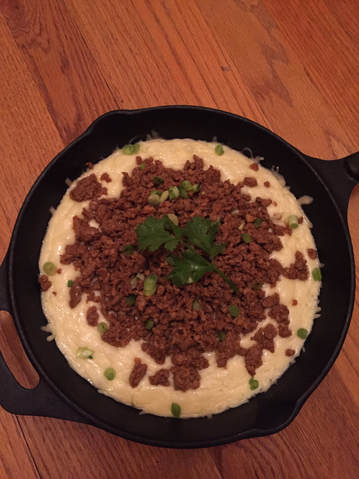
So how do I cook a pork roast? I haven't made the jump to an instapot *yet* so I use a crockpot, but you could just as easily do this in the oven or instapot. I rub the roast down with salt/pepper/garlic, slice an onion and add it to the crockpot with a little bit of water and cook low and slow. Then I take two forks and shred the meat. I usually serve for dinner that night with some vegetables and save the extra stock to make beans or a soup with at a later date. Then the leftovers can be used to make pork tacos, bbq, soups & sandwiches! Depending on your family size you really can make it stretch for 3-4 meals including the stock. Easy, versatile, nutritious, & economic. You can make it as simple or as inventive as you want by cooking with herbs & vegetables. We're offering all Cool Breeze Farm boston butt & picnic roasts at 15% off retail price in our Market right now! Come and visit us this week: Market Hours Tues/Thurs: 4:30-6:30 Saturday: 10:30-12:30 273 Salem Church Rd Mt. Sidney, VA 24467 **cards & checks preferred** This is the recipe you've been waiting for! Our first recipe well, it was okay but it had flaws. This Chorizo dip recipe is THE ONE. It is going to be a HIT at your Super Bowl party! Read on to find out how easy it is to make and where you can pick up a pack of our popular Chorizo sausage! It can't get any easier than this. Two ingredients, one dirty pan (if you don't count empty serving dish...because it WILL come back empty) and I even cheat and use the microwave to melt the cheese. Forgive me cheese connoisseurs, this won't earn me any points with you but there is a time and place for white, creamy cheese that melts in the microwave and this is that time! Let me introduce you to our two ingredients for the best Chorizo Dip you've ever tasted. The star of the show, of course, is our fresh Chorizo sausage. It's a ground pork sausage with the perfect amount of chili spice & garlic to boost so many recipes from "meh" to "WOW, what is that?!". The cheese that I found works best is a white cheese dip, & in this case I used the brand Gordo's and found it in the deli cheese section of my grocery store. The problem I had in the last recipe is that the cheese wasn't creamy when melted so you want to make sure you find a brand that will melt down and work in dips. Here are the directions: 1. Heat a medium size frying pan to medium. Add a touch of oil to grease the pan. Add chorizo and cook up like you would ground beef, into little crumbles. 2. Start melting your cheese in container per directions. Make sure you stir as you go. About 30 seconds at a time. Ask forgiveness for drooling over melty, white cheese straight from the microwave. It's okay and no one else knows but me and you. 3. Get out that cast iron skillet that you keep telling yourself to use but can't figure out how to cook with. Oh, sorry, is that just me? Use a smaller one if you have it so the dish looks full. If you only have a large/medium cast iron skillet you might want to double the amount of cheese you use or just find another small serving dish that has the right depth for chip dipping. 4. Add the melted cheese to the cast iron skillet. 5. Drain the chorizo and start adding scoops to the middle of the pan. 6. Add a cilantro garnish if you wish and serve with tortilla chips! I'll note that if you are transporting this dish the meat will settle in and mix with the cheese by the time you get there. But it still tastes just as delicious! Ta-Da! Doesn't that look amazing? And you will get to tell everyone how your chorizo sausage is locally raised and pasture grazed by your neighbors here at Cool Breeze Farm. Your dish not only tastes delicious but it tells a story--how often can you say that?! You can pick up a pound of Cool Breeze Chorizo at the Open Farm Day we are hosting *this* Saturday, Jan. 27 from 11:30 a.m. to 2:30 p.m. Can't make it out? Don't worry--we will be announcing new open market hours very soon and you can also email valerie@coolbreezefarms to talk about delivery.
Enjoy! -Valerie We promised you a Super Bowl Sunday chorizo dip that would have your family and friends raving at what an amazing cook you are. Well, here is part one of our two part chorizo dip recipe and let's just say that the flavor and taste of our chorizo made up for how not-so-great this dip came out for me. Have no fear, it still tasted good and if I would have found the specific cheese they asked for in the recipe I am sure it would have been more successful. We are also guaranteeing our Part Two recipe to be a success in your kitchen.
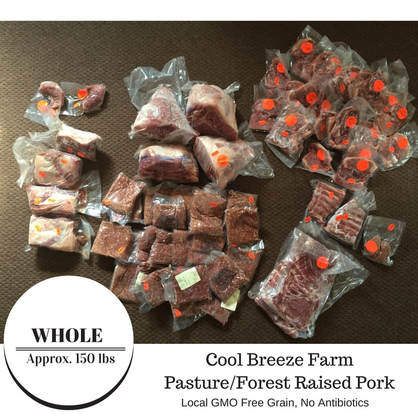
In my search for the perfect chorizo & cheese dip I came across this recipe from www.ohsweetbasil.com. What really grabbed my eye was the display and I imagined all of you Cool Breeze chorizo customers walking into your party with a cast iron skillet full of chorizo deliciousness that also looked amazing. I am no Pioneer Woman and my photography skills are lacking but it did look really great when I put it together. And talk about simple?! You literally just cooked the chorizo in a pan and put a skillet full of cheese in the oven. It tasted great but we sort of had to cut the cheese like a pizza. It had hardened up by the time we got to our get together with friends. I could not find the queso quesidilla cheese that the recipe called for anywhere in my grocery store so I followed their substitute suggestion of montery jack cheese but *sigh* it was not the creamy experience that I wanted everyone to enjoy with our chorizo. I did however, still have raving reviews of our chorizo sausage. It is the perfect spice and flavoring! If you can find the queso quesidilla cheese then I bet this recipe would be amazing and our next chorizo dip recipe WILL be the creamy goodness that we are all looking for. Stay tuned! -Valerie ***We will be selling our popular ground chorizo sausage at Deep Roots & Co's Open Farm Day on January 27 and will have market hours open after if you would like to stop by and pick up your pastured pork needs! Please email [email protected] if you have any questions*** If you are looking for the best price for pasture/forest raised pork and have access to a deep freezer buying in bulk is by far your best bet! We are happy to offer you half or whole shares of pork raised on a pasture diet of grasses, nuts, natural foraging, and gmo-free feed from a local producer. Here are the top 3 reasons buying in bulk is the best choice for you: 1. Save money -Buying a share of a half or whole pig is the lowest price per pound you can purchase. Whole shares come in at only $6.50 lb and half at $7 lb! That is around 20% off retail! 2. Save time -Are you a meal planner? Buying in bulk is a great way to avoid the meat section in the grocery store and plan meals weeks in advance. Save money and time. 3. Healthiest Meats -Have the peace of mind knowing that you are feeding your family the healthiest, nutrient rich, & ethically raised meats. Supporting your local farmer by purchasing a share ensures that we are here to serve you for years to come! Keep scrolling down for details on ordering your half or whole share of pork! We are currently taking orders for the end of January and pre-orders for February & March. Deposit required.
Details: $6.50 per lb. Whole Hog (approx. 120-150 lbs.) $7.00 per lb. Half Hog (approx 60-75 lbs.) Cuts include: ground sausage, pork chops, roasts, sides, fresh hams, & ribs. Butcher fee included. PayPal (fees included), cash, or checks accepted. email [email protected] or call 540-271-8430 for questions and to place an order. |
Welcome!We hope you enjoy reading more of our day to day adventures on the farm. Archives
November 2019
Categories |








 RSS Feed