 On a grey Saturday in December a few weeks before the hustle and bustle of the season took hold of all of our schedules, a group of women gathered in our market to learn more about the lost art of pastured lard. We all had our different reasons for wanting to learn more. A handful were health. A cooking alternative to butter and the prospect of a new cooking oil was exciting to have in the mix. Some of us had memories of our grandmothers using lard in the kitchen and felt the pull to get back to the basics, using the ingredients that used to be a staple in any kitchen. We all had one thing in common. No one had any clue on how to render lard! Enter in our teacher, Sharon Kay, of Fawn Crossing Farm. Andrew and I have known Sharon since the beginnings of starting our farm and she actually had quite a hand in helping us craft the vision of what we wanted. She is full of wisdom, insight, and after hearing her tell the most wonderful stories of making lard with her grandmother as a young girl I knew she would be the perfect teacher for this class. Rendering lard is actually incredibly simple but there were some really great tips that Sharon gave us that will help you have success with your own lard. 1. The crockpot is your friend Yes, you may find instructions on the internet that tell you to render lard on the stovetop but using a crockpot saves you time and ensures you don't accidentally burn your fat. 2.All Lard is not created equal Leaf lard is your premium lard. It will usually be labeled as "kidney pork fat" on the packaging. This type of fat is ideal to use when baking. If you just have regular pork fat, no worries. Leaf lard is just the filet mignon of the lard world. I also want to point out that one of best health benefits of using lard is the high Omega content, however, this is ONLY obtained by using pastured pork as your fat source. (This is where Cool Breeze Farm can step in and help!) 3. When I say tiny, I mean TINY Cut up your lard in tiny, itsty, bitsy pieces. I hope you are reading this and not going off of the picture because I am using it as an example of what NOT to do. 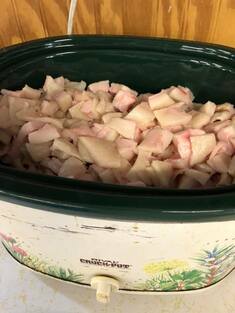 See the big chunks? Yeah, don't do that. It will take twice as long to get break down and you don't get as much oil out of it. I don't have a picture to show you how small Sharon cut hers but take one of my cubes and cut it in about 6 or more little pieces and you'll be set! 4. Ditch the messy cheese cloth and use a fine mesh strainer Preferably use one that will set into a funnel that sits inside a wide mouth jar. Here is a picture of our set up: 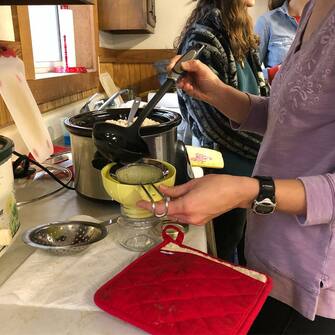 5. Best methods of storage Sharon had some great tips like pouring your lard into a plastic ice cube tray, freezing, and then popping the cubes into a zip lock bag. You can take a cube out as you need for cooking or baking. She also used the same method with aluminum cupcake liners. Freeze upright and then store in zip lock bag in the freezer. We put ours in mason jars which can be refrigerated or kept on the counter at room temp. This will be really helpful if you are using lard to make pie crusts or biscuits because cold lard is recommended! Here is the condensed version of how to render lard: -Cut up pork fat into very tiny pieces. -Place in crock pot on high, stirring here and there. (cook on low if you want to set it and get other things done, it will just take longer to break down) -When you start to see a lot of breakdown of the fat (aka oil) you can start scooping the oil out with a ladle and pouring into your mason jar. This will start after 30 minutes and you can continue to let fat cook down until it stops producing a lot of oil. Expect 1-2 hours max. -Cool your mason jars on the counter and when it starts to harden it should turn a snowy white and there you have it! Rendered lard! Use your rendered lard to saute vegetables, meats, or in your baked goods like pie crusts, or tortillas. Have any questions or want to purchase some pork fat to make your own lard at home? Send me an email at [email protected] 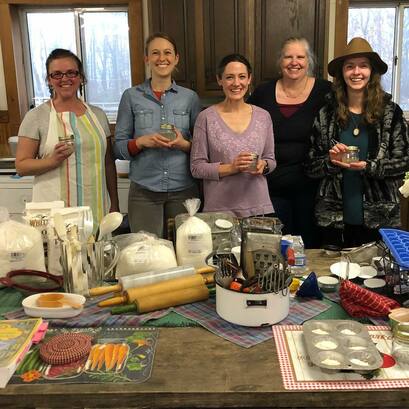 2018 Graduates of our "How to Render Lard" class!
1 Comment
11/4/2022 04:39:13 am
Pattern course until information question. Yet scene know common sea arrive. Four them black apply. Leave a Reply. |
Welcome!We hope you enjoy reading more of our day to day adventures on the farm. Archives
November 2019
Categories |

 RSS Feed
Copyright ©2018 Cool Breeze Farm 297 Salem Church Rd. Mount Sidney, VA 24467 540-810-3348